Creating a lathe tool
Start by opening your tool manager. This is the second tab at the bottom left of the screen.
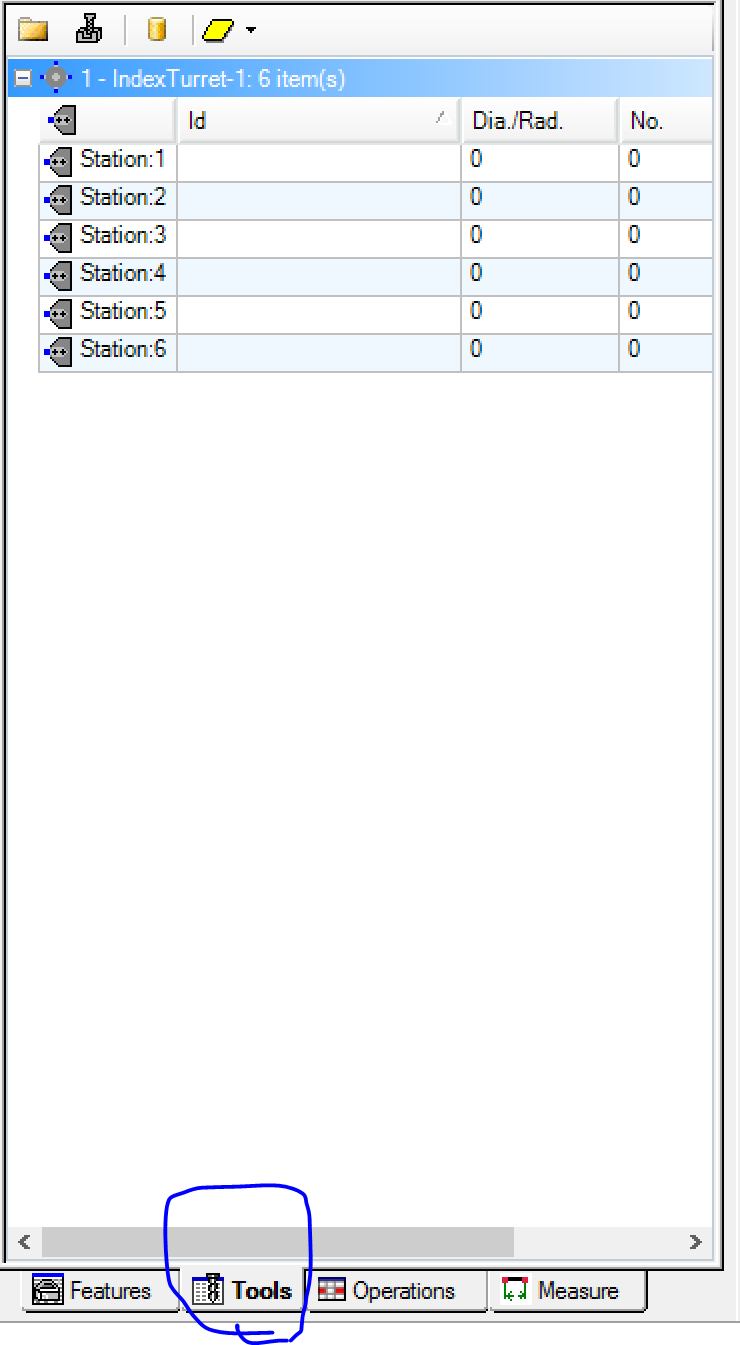
To add a tool, select the desired station where you would like to add the tool, then right click.
*To load a tool that has already been created, select File / Open and the Tool Library window will appear. This will display all of the saved tools. Click open to add the tool
*To create a new tool, select New / Turning Tool / Turning Insert
This will open the below window, with detailed information on the turning insert geometry.
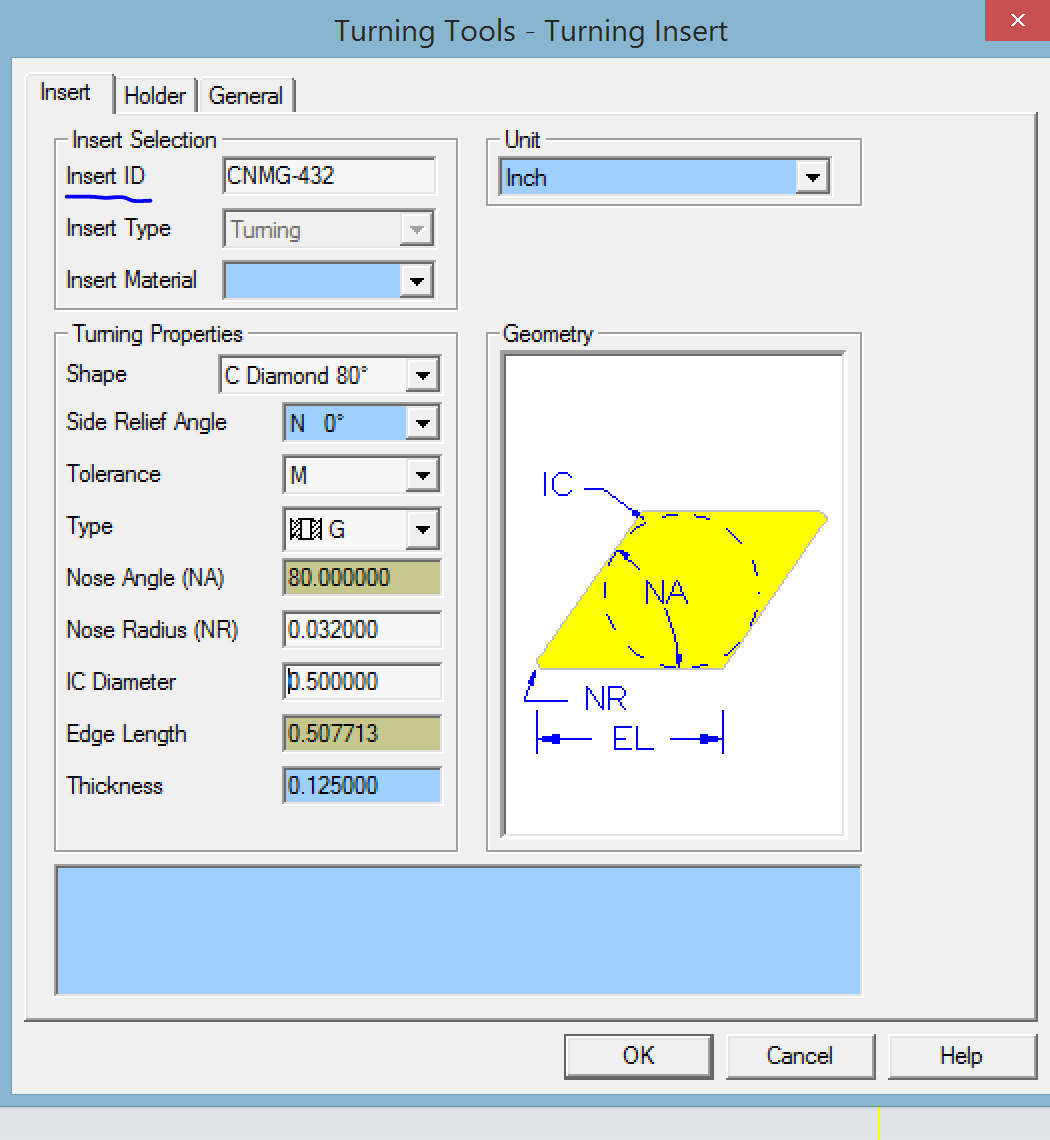
The insert we are creating is a CNMG-432, which is used for roughing operations.
-Note the geometry graphic that helps show what each setting represents –
-Note be sure the insert ID at the top box always matches the settings below.
Next click on the Holder tab, at the top of the window.
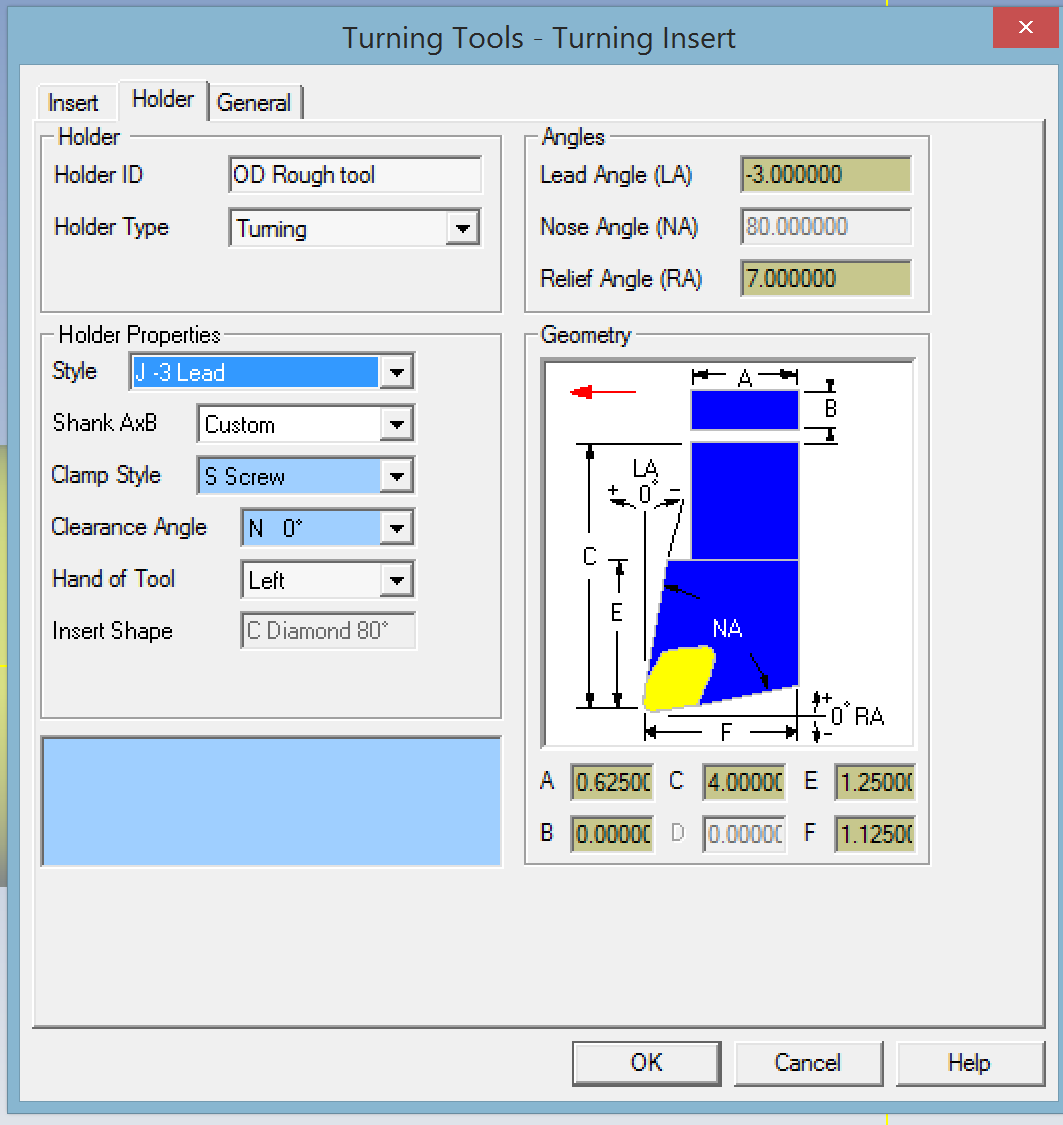
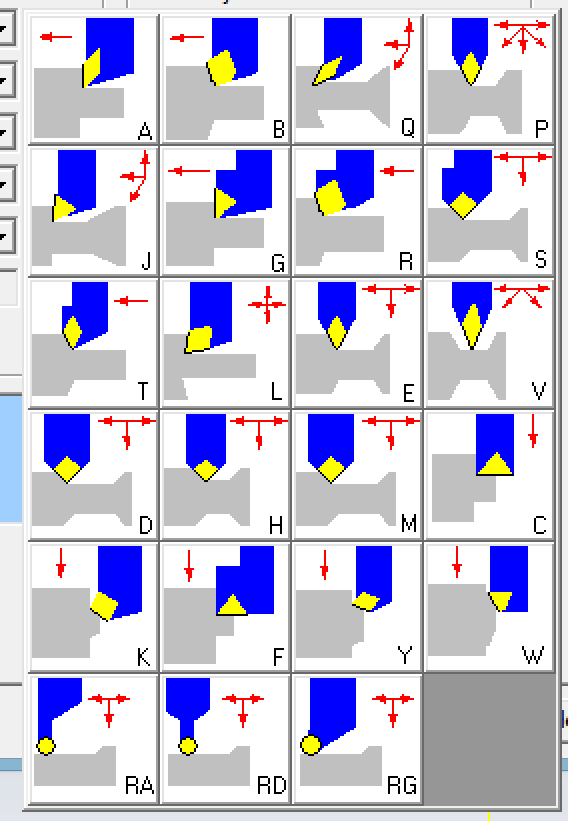
The tool holder settings and insert settings determine the directions and geometries that your tool can cut. Under Holder Properties, click Style. This will open the window to the right, which shows the different styles available, and the directions they can cut.
We will use the J style -3 degree, as this is a good style for roughing.
Now select the General Tab.
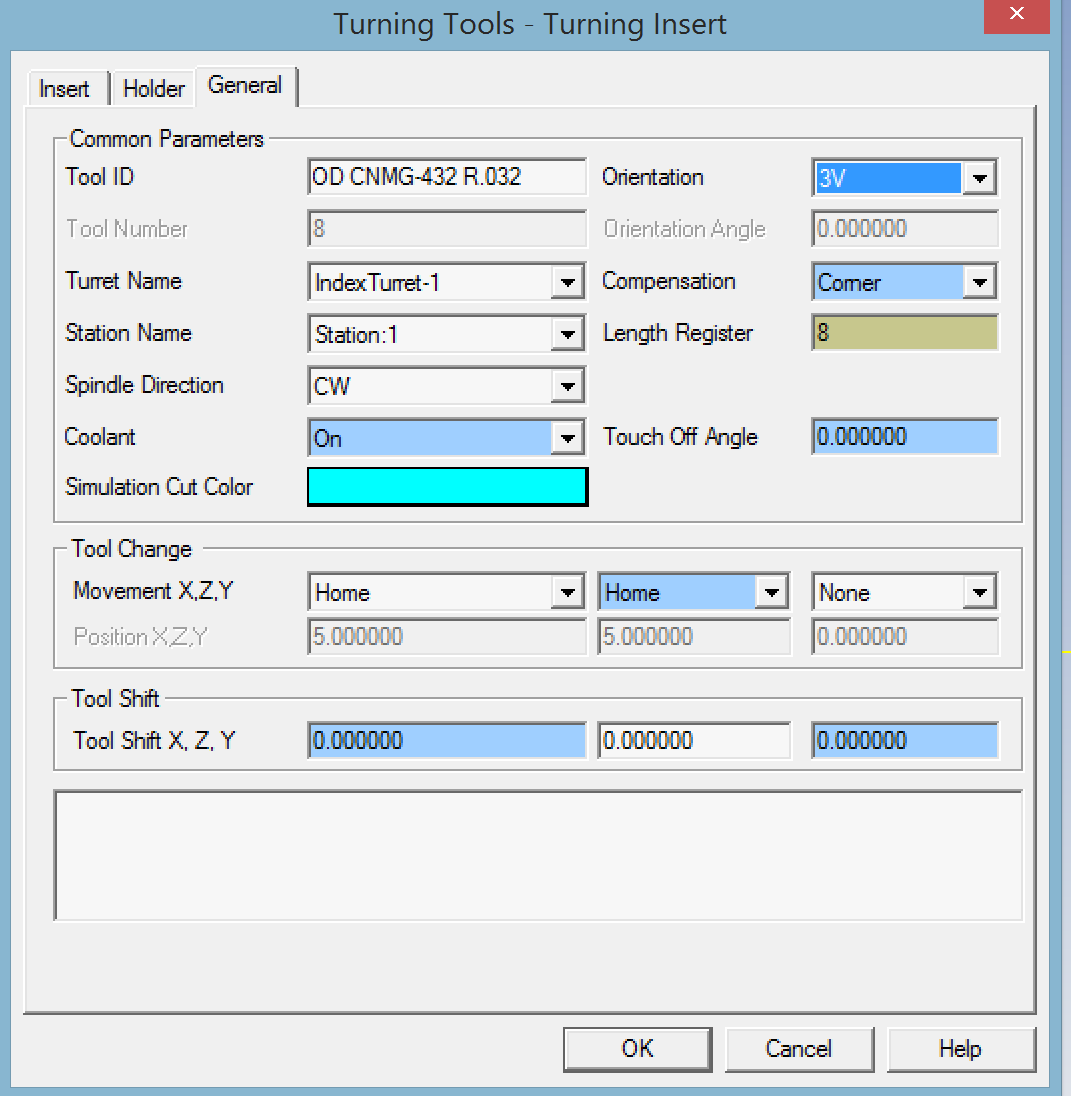
In the “Tool ID” box, type a name for the tool, something that describes its settings.
The orientation box is how the machine determines the direction the tool is held. Select 3V for OD turning. This orientation will allow us to do rough OD operations, and light facing operations.
Related Content
Esprit CAM Tutorial-Creating & Adding Tools
Esprit Lathe Tutorial-Drawing 2D Geometry
Esprit CAM Tutorial- Creating & Setting Up Lathe Stock
ESPRIT Mill Tutorial- B Axis Setup
Esprit CAM Tutorial: Lathe Sub-Spindle Setup
Esprit CAM Tutorial: Lathe Basics
Esprit CAM Tutorial: Introduction To Esprit CAD/CAM
Esprit CAM Tutorial: Orientating Part Model For Lathe Operations
Esprit CAM Tutorial: Setting Mill Up Stock
Esprit CAM Tutorial: Creating Layers
Esprit CAM Tutorial: Orient Mill Parts